There are dozens of ways to use Acres' custom mapping features. In this mini webinar, we'll show you how to create a map for a residential development project. You'll learn:
- How to define and customize boundaries to showcase different phases of the project.
- How to clone and customize boundaries.
- How to add notes, photos, and labels to add important details to your map.
- How to generate sharable reports and custom map embeds.
The Process
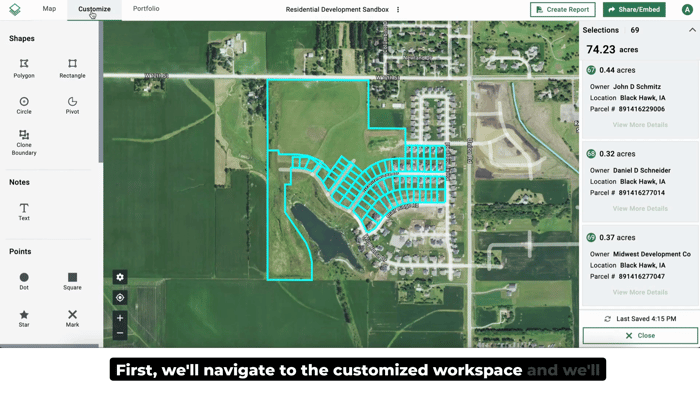
1. To get started create your custom map.
- Navigate to the Customize Workspace: This is where you'll make all the edits and customizations for your map.
2. Define and customize boundaries to highlight different phases of the project.
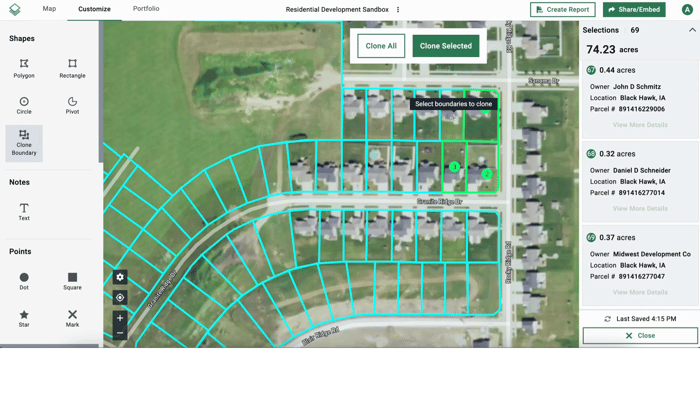
- Clone the Boundary: Click the "clone boundary" button to create an editable version of the property boundary.
- Select and Edit Boundaries: Select the relevant boundaries for each phase of your project. Click “clone selected." Tip: You can also click "Clone All" to clone all the boundaries in your selections panel on the right.
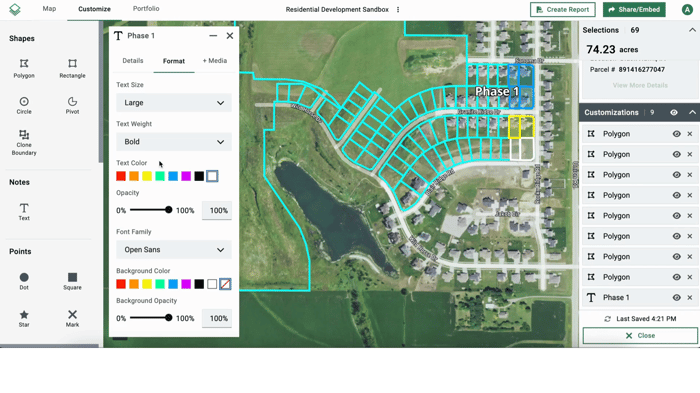
- Edit Colors: Open the editing dialog box, go to the Format tab, and select your desired colors for borders and fill (e.g., blue for phase one, yellow for phase two).
3. Add notes and labels to include important details on your map.
- Place Notes: Click on the map where you want to apply a note and select Text in the customization panel on the left.
- Edit Note Text: A dialog box will open to add text. Type in the text you'd like to include.
- Customize Appearance: In the Format section, adjust font size, text color, and other styling options.
4. Highlight points of interest and draw roadways for easy viewing.
To add points of interest:
- Drop Points on the Map: Select one of the points from the customization menu on the left. Drop points on the map to highlight locations, such as a construction site office.
- Label Points: Add a title and a description (e.g., notes on temporary buildings) in the dialog box that opens.
- Upload Photos: Click + Media in the dialog box. Drag and drop or upload images to further customize the point of interest.
To draw roadways:
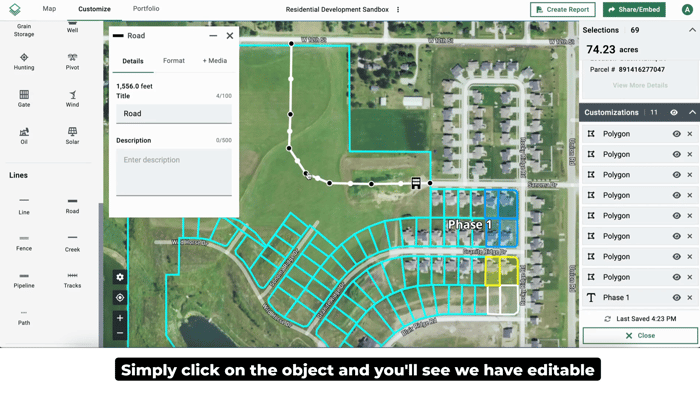
- Select Line Options: Choose the type of line (e.g., Road) from the customization menu on the left.
- Plot Roadways: Click the starting point and each subsequent point to draw the road, accounting for curves.
- Edit Points: After drawing, click and drag points to adjust road positioning if needed. Just like other customizations, you can format and add photos by clicking the different tabs in the dialog box.
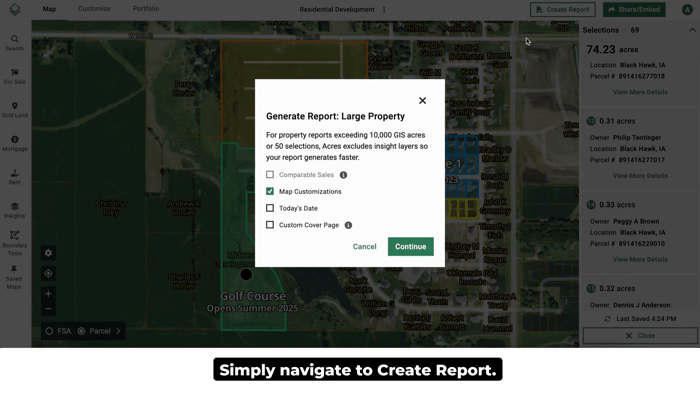
5. Generate your report to share with stakeholders or for marketing purposes.
- Create a Report: Navigate to "Create Report" to generate a PDF with your customizations, including notes, images, and an aerial view of the project.
6. Share and embed your custom map so everyone can view it.
- Create a Shareable Link: Click the "Share Embed" button to generate a link. Then, click "Copy Map Link."
- Review Map Features: Recipients of the link can view images, notes, and basic land insights even without an Acres account.

Final Thoughts
Acres custom maps allow you to quickly and easily map out residential developments, denote boundaries, add notes and labels, highlight points of interest, and mark future roadways. Sign up today and create two free custom maps just like this one: